Our ThumbsGallery extension allows you to easily create a simple and stylish thumbs gallery module in any module position on your site. The module will automatically create thumbs for each of your images, linking them to the original image in a stylish, easy to navigate lightbox.
To install your ThumbsGallery module navigate to Extensions -> Extensions Manager. Select the install file from the corresponding folder to your Joomla version (mod_j51thumbsgallery.zip) the download package of your template and click Upload & Install.
Once you have installed the module set up the folder from which you want the module to retrieve the images for your gallery. Navigate to your Media Manager (Joomla 3.x - Content -> Media Manager). Create a new folder within your Media Manager (eg. gallery), select the new folder and upload all the images you wish to be included in your gallery in to this folder. Note that you can select multiple images when uploading.
At present this module supports jpg, bmp, gif and png image formats.
For best results we suggest keeping all images to the same aspect ratio. As the module uses the same size for each of the thumbs created this will avoid any of your images been distorted.
Once you have created your gallery folder you can then go about setting up the module. Navigate to Extensions -> Module Manager -> J51 ThumbsGallery to open the modules settings.
In the Details tab set your module position and title and ensure the Status is set to Published.

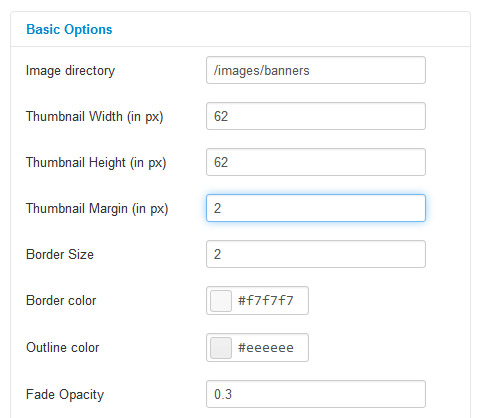
Navigate to the Options tab for the settings specific to the ThumbsGallery. These settings are as follows..
- Image Directory - Select the image directory of your choice in the format /images/gallery where gallery is the name of the folder in which you have placed your images within your Media Manager
- Thumbnail Width (in px) - Set the width of your gallery thumbs (eg. 50)
- Thumbnail Height (in px) - Set the height of your gallery thumbs (eg. 50)
- Thumbnail Margin (in px) - Set the margin for each of your thumbs. This is the spacing between each of your thumbs (eg. 4)
- Border Size - Set the border size of each of your thumbs in pixels (eg. 3)
- Border Color - Set the color of your thumb borders
- Outline Color - Set the color of the 1 px outline to your thumb borders
Once you have set up each of these field to your liking navigate to the Menu Assignment tab a set the menu items in which you wish your module to appears.
Click Save and your done!
