-
Joomla Basics
- Adding a sub-menu (child) item to a menu
- Adding text/image to a Joomla module position
- Adding Vimeo to a Joomla module
- Adding Youtube to a Joomla module
- Creating multiple template styles
- Editing Joomla template files
- Hide a Joomla module on mobile devices
- Hiding the 'Home' menu item in Joomla
- How to create a Joomla login page
- How to install your Joomla template
- Loading a module inside a Joomla article
- Updating your Joomla template
Joomla includes powerful user managerment which allows you to assign content to users depending on their user group. If you utilise this feature you would quite likely wish to create a login page for your users. To do so you simply create a menu item linking to the login component view.
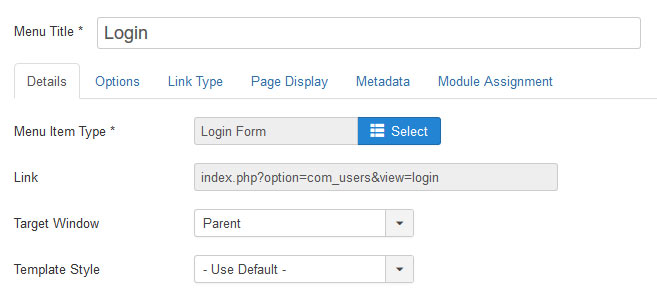
- Navigate to Menus -> [Your Menu] -> New
- Add a title to your login menu item (eg. Login)
- From the Menu Item Type field select Users -> Login Form
- Click Save
You may wish to only have the login page hidden to users that are already logged in. To do so, in the right column of the Details tab set the Access dropdown to Guest. Once a user logs in, the 'Login' menu item will no longer be displayed within the menu until that user logs out.
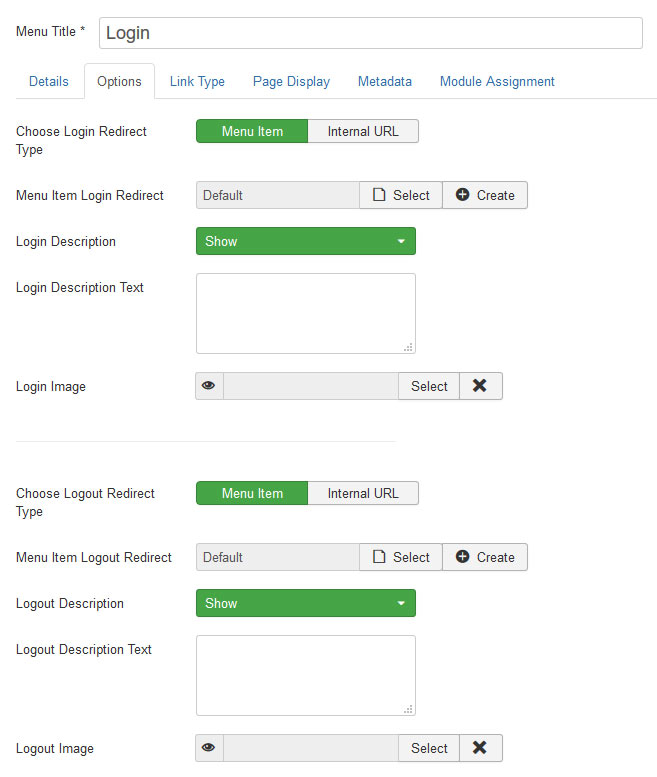
In the Options tab you can further customise the login page and behavoiur. This includes options such as a redirect desination after login, login image and a login description.
Once installed a Joomla template resides in the template folder in the root of your Joomla installation. Joomla allows you edit or add to these files directly from within your Joomla administration.
Firstly you must ensure that you have the appropriate permissions to access your template file editor. Permission to do so are normally reserved for users with Super User access.
Accessing your template editor
- Log in to your Joomla administration using super user access details.
- Navigate to Extensions -> Templates
- Click into the template you wish to edit.
Presuming you have the correct permissions, you should be presented with a browser for your template files. From the left column you can browse your template files and folders. Simply locate and click the file you wish to edit. This file will then be opened within the right panel. Presuming it is a text based file (eg. file.php, file.css etc.), it will be presented within an editor which you can use to edit the code as required. Once you have made your amendments, click Save to apply your changes.
Other options available include renaming of files, creating new files and deleting files. You can manage folders using the Manage Folders option in the toolbar which include options to create and delete folders within your template.
It is worth noting that any amendments to your template will be overwritten if you update your template. For this reason it is always a good idea to backup your template folder prior to updating.
From time to time we make changes to our templates. Either adding new features or amending an issue that has arisen with the template. In the following tutorial we will detail for you how to install the latest version of your template.
Before updating your template there is a couple of points worth noting.
- All core template files will be replaced when you update your template. These are all the files located at ../templates/[YourTemplate]/ from the root of your Joomla installation. So if you have made any changes to these files, ensure to back up the template prior to updating.
- No template style settings will be lost. All template style settings (Extensions -> Template Manager -> [TemplateStyle) are stored in the database and will not be effected by updating your template.
Updating your Joomla51 template is a simple case of installing the latest install file of your template. To do so follow these few simple steps.
- Once logged in to our site, download the latest version of the template from your 'My Downloads'.
- Extract your template download in to its separate files and folders.
- From your Joomla administration navigate to your Extensions Manager (Extensions -> Extensions Manager).
- Click 'Browse' and select the template install file from your newly extracted download (eg. ../Joomla! 3.x Install Files/j51_yourtemplate.zip).
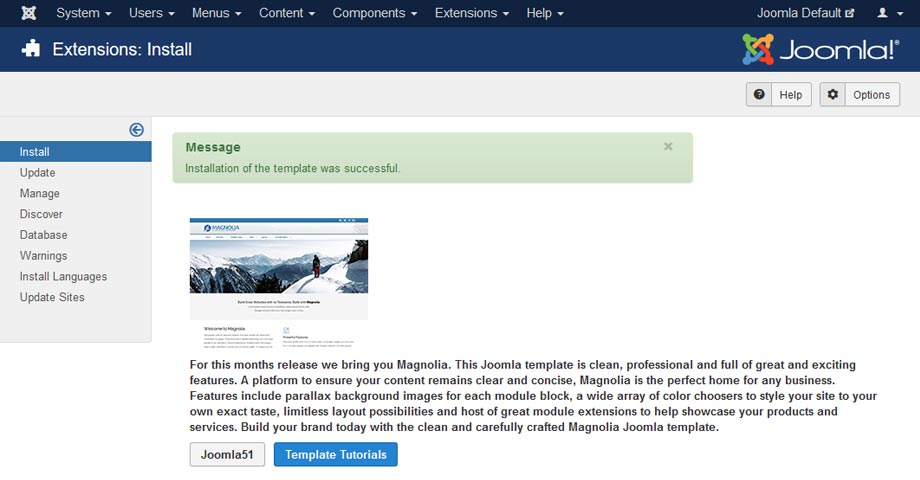
- Click 'Upload & Install'. You will then be presented with the message 'Installing template was successful.' indicating that your template has been updated successfully.
Installing your new Joomla51 template or indeed any template is a quick an easy task and can be achieved within a few simple steps. In this tutorial we will guide you through this process.
- Your template comes with a number of different files including template install files for different Joomla versions, modules, guides etc. We have therefore zipped all these files into one package so you can retrieve all files associated with your template in one single download. Before you install your Joomla51 template you must first unzip your download in to its separate files and folders.
- From your Joomla administration navigate to your Install Manager (Extensions -> Manage -> Install).

- Select the Upload Package File tab and click the Or Browse for File button.
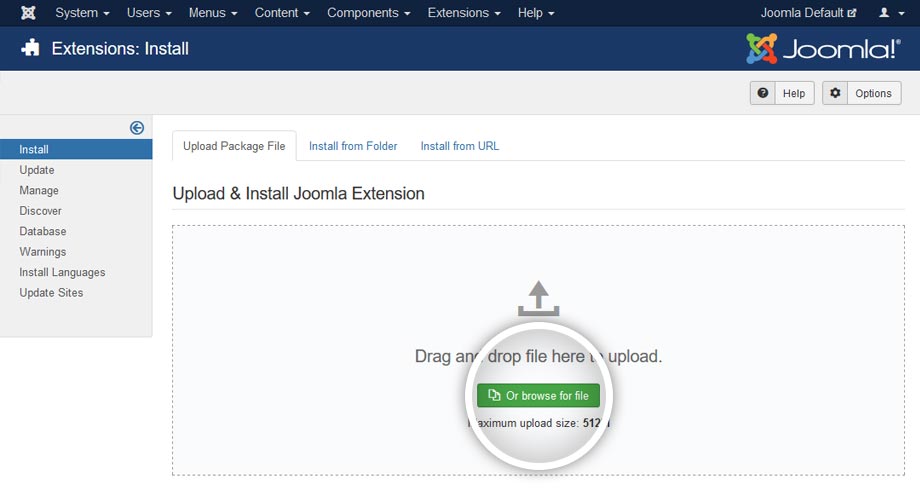
- Select the install file for your template from the download that you have just unzipped. You will find this located in the Joomla! [JoomlaVersion] Install Files folder, titled j51_[TemplateName].zip.
- Your Joomla template will then be installed. Once installed you should be notified that the installation was successful.
- Upon a successful installation, you will find your newly installed template listed in your template manager (Extensions -> Templates -> Styles). From here you can set your template as the default or assign it to the menu items of your choice by clicking in to your template and using the Menu Assignment tab.

Note that this process only installs the template. It does not install any content that might have been used to demonstrate the template on the template demo. To create an exact copy of the template demo you must used the template Demo Installer bundled with your template download. Details of setting up the template demo installer can be found here.
There is times that you will wish to place a module inside one of your Joomla articles. There can be any number of reasons why you might want to do this..
- The module positions are not available or not suitable to place the modules above or below your Joomla article
- You wish to place a module in the middle of your Joomla article
- You wish to assign a module to a single article rather than assigning the module to each of the menu items linking to that Joomla article
One other instance that this can be particularly handy is that if you have certain content which is common to a large number of articles. Placing this content inside a 'Custom HTML' module and loading this same module in to a number of articles allows you the option to edit this content within each of your articles by simply editing the corresponding 'Custom HTML' module.
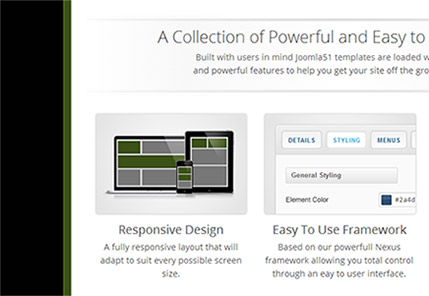
A good example of this can be seen here on Joomla51 with the template detail pages (J51 - Nocturne). At the base of each of the template details you will notice a collection of boxes displaying features of each template. These are Custom HTML modules placed within each page. If at any time we wish to edit this area of the details page we simply have to edit a single module and these changes will be applied across each of the template detail pages loading this module
The first thing you will need to do is create the module..
- Login to the administrator panel of your Joomla installation
- Navigate to Extensions -> Module Manager -> New and select the module you wish placed in to your article (eg. Custom HTML)
- Set the module postion to one that does not exist in your template. To achieve this, click on the dropdown box next to the 'Position' option and simply type in a new, distinct, module position (eg articlemodule_footer. I like to give the modules a common prefix (eg articlemodule_). This allows me to easily search for my article modules at a later date.
- Set the 'Menu Assignment' to 'All'. (Note: it will only appear on the pages with your article because it is the only place where the articlemodule_footer module position is called)
- Setup the rest the remaining parameters for your module and click the 'Save'.
Once you have set up your module it is now time to place it inside the article(s) you wish it to appear. For this the Joomla! team has provided us with the loadposition function.
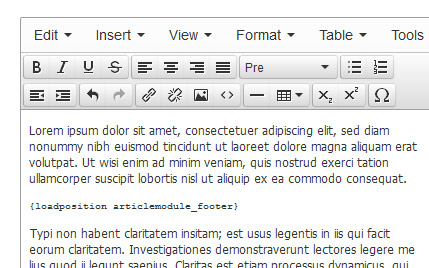
Open up the article(s) in which you wish to place your module and navigate to the area of the article with in your editor where you want the mopdule to appear and type the following...
{loadposition position}
Replacing 'position' with the position name you assigned to the module which you have just created. Eg..
{loadposition articlemodule_footer}
Click save and your done!
If you find that the module is not showing in your article be sure to check the following...
- Navigate to Extensions -> Plugin Manager and ensure that the 'Content - Load Module' plugin is enabled.
- Clear your site's cache and refresh the page. (Joomla Administration -> System -> Clear Cache)
- For us to be able to display this function in this tutorial we had to place the curly brackets surrounding the function in italics. Ensure the italic styling was not copied across if you have copied the function directly from this article.
Note: If rather than loading a module inside an article, you wish to load a module inside another Custom module it is important to enable the Prepare Content option in the Options tab of your custom module settings. This ensures the load module plugin is fired with your module.